Auto
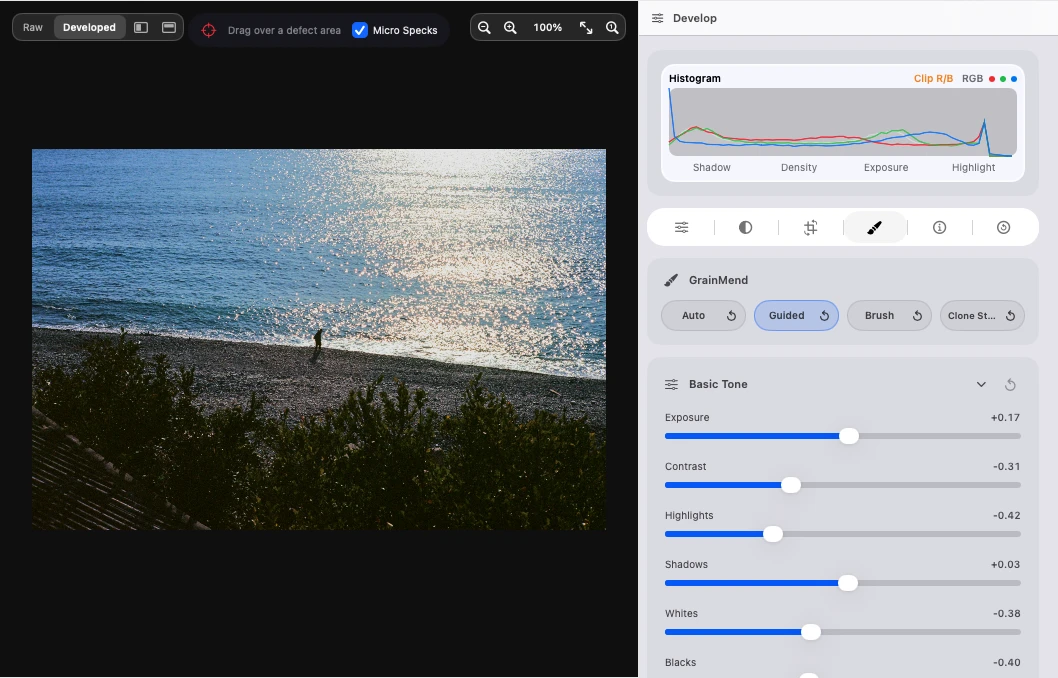
Finds and restores defects across the photograph.
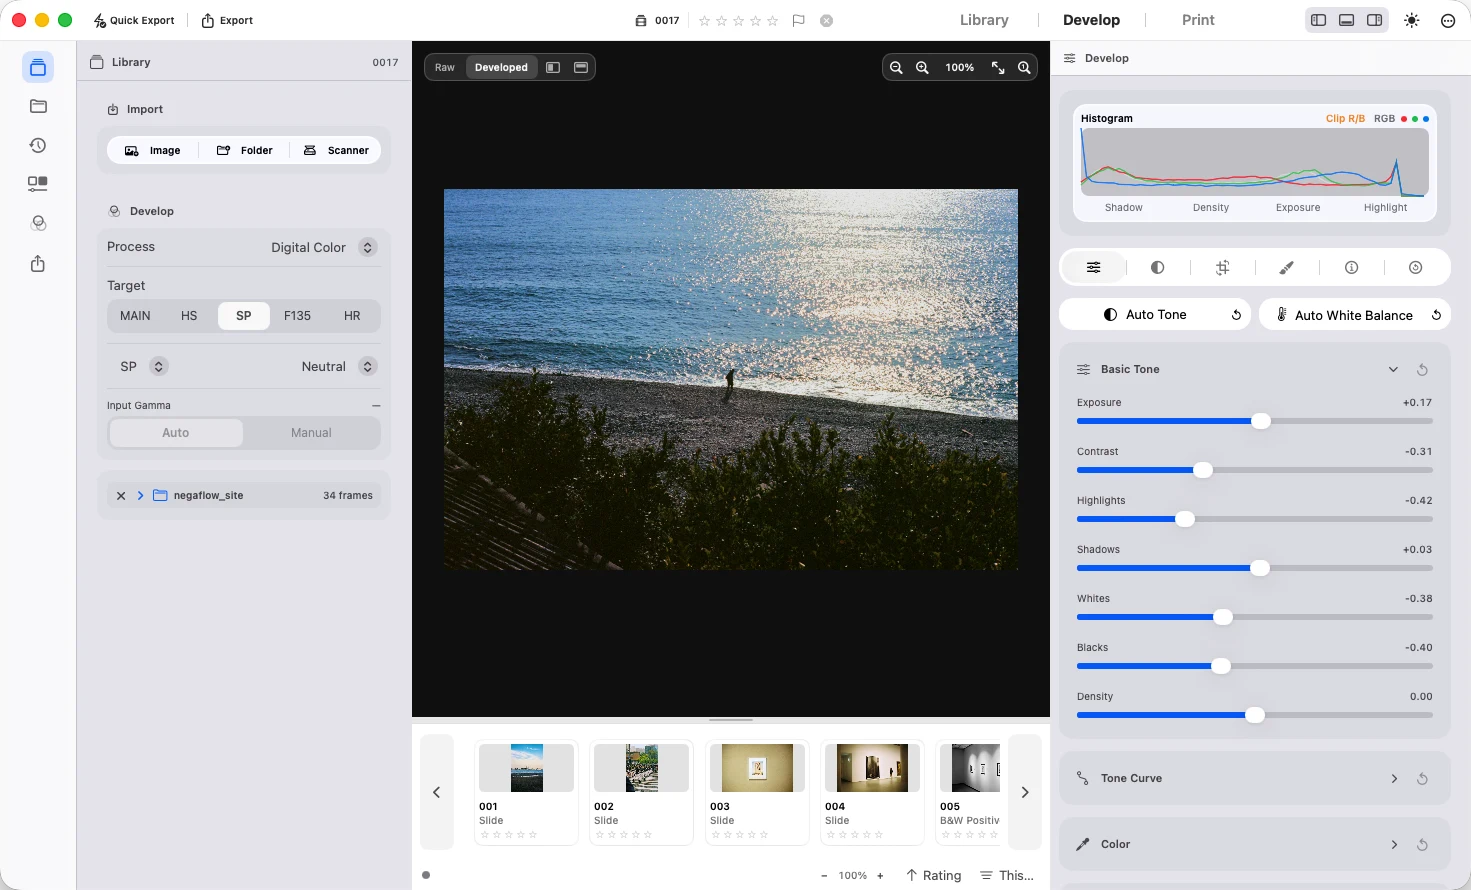
Camera or scanner capture,
development and print in one analog-film workflow.
macOS 14.0 or later · Apple Silicon and Intel · Apache-2.0
negaflow imports film captured with a scanner or digital camera and develops it on macOS. Its development engine is called Chroma Engine, and its dust and scratch restoration system is called GrainMend. The entire process is developed independently and brings film development, adjustment, and output into one app.
Development engine
Chroma Engine is the film inversion and development engine in the Chromabase module.
MAIN
Auto-corrected
The film base is measured automatically with no setup, and the negative is inverted to a positive. For manual control, select an unexposed area with the eyedropper or enter RGB values directly.
Seven Minilab & Development Target Looks
MAINGeneral developmentPRINTOutput using a printer ICC profileHSNoritsu HS-1800SPFujifilm Frontier SP-3000F135Pakon F-135 PlusHRKodak Professional HR 500 PlusEXPIREDRecovery for old filmPROFILES15 bundled scanner profiles · realOnlyThe default is MAIN with manual adjustments. Auto Tone, Auto White Balance, Auto Levels, and Auto Color are applied only when you run them.
Output can use sRGB, Display P3, Adobe RGB, or a custom RGB ICC profile.
HS, SP, F135, and HR target well-known film scanners long used in professional lab workflows.
Model names identify development targets only. They do not imply implementation of a manufacturer’s software or internal algorithms, a compatibility mode, affiliation, or endorsement.
Defect restoration
GrainMend RGB is an independently developed software method that detects and restores dust, pinholes, scratches, and emulsion damage without an infrared channel.
GrainMend RGB
Guided, Brush and Auto all run locally on the Mac. Processing time depends on image size, the selected area and the Mac.
Finds and restores defects across the photograph.
Finds defects inside an area you specify.
Paints the area to restore directly.
Copies pixels from a selected source to another location.
GrainMend RGB finds defect candidates without an infrared channel. Complex patterns can produce false detections, so the mask and restored result remain reviewable.
Inspect the detection mask and restored result yourself, then correct the affected area as needed.
Each GrainMend RGB layer can be adjusted in strength, inspected as a mask, disabled, or deleted separately.
GrainMend alerts the user when false-detected areas are likely to occur.
GrainMend IR is an optional path when the scanner plugin provides an infrared channel. Its detection result is added to the same edit history as GrainMend RGB.
GrainMend RGB is an independently developed software method, separate from hardware infrared cleaning. GrainMend IR uses the scanner’s infrared channel; it is not an implementation or compatibility mode of Digital ICE, iSRD, or SRDx.
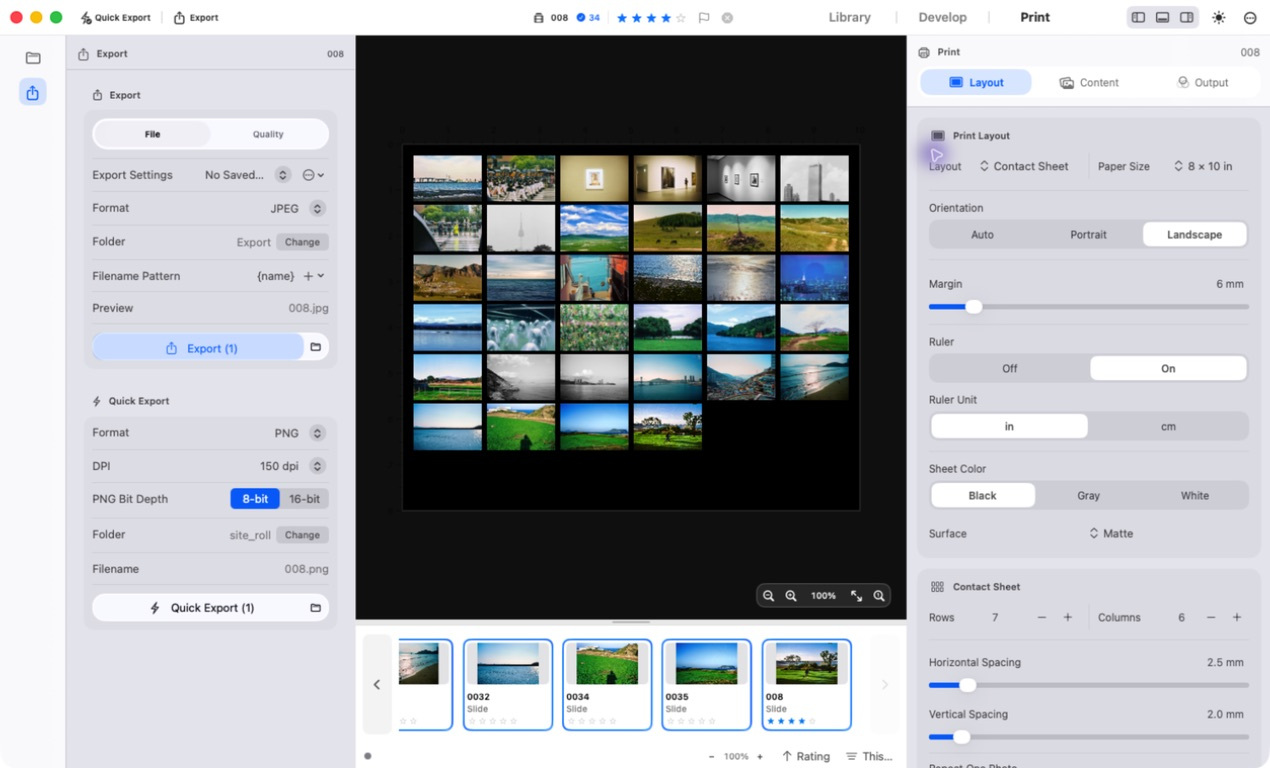
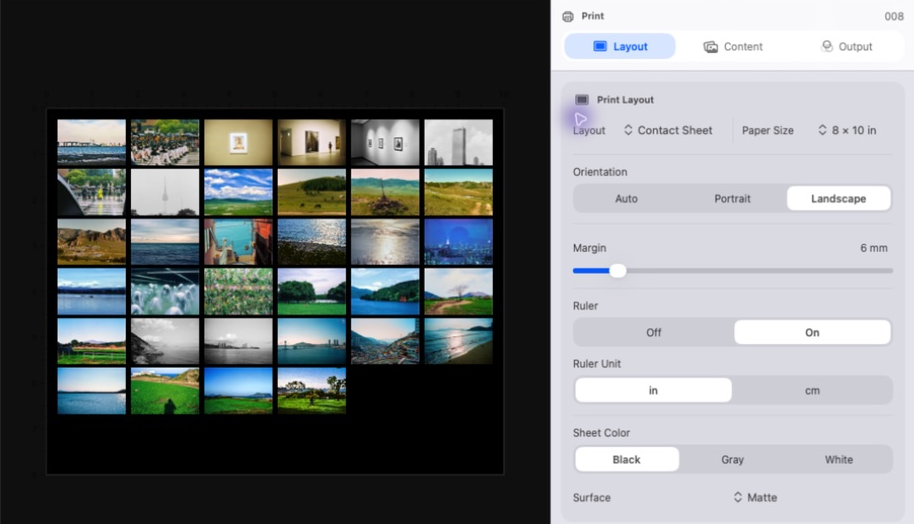
Print & Export
What used to happen on paper in a darkroom happens on screen here. Set the paper, the margins and the layout, and the print file comes out looking like that.
Cyanotype, glass plate and gelatin silver are made to look the part. They are not measured from real chemistry, plates or paper.
Supports sRGB, Display P3, Adobe RGB, and custom RGB printer ICC profiles.
Borders are set the way you would set them in a darkroom, and the page renders to high-resolution 16-bit TIFF.
Color Mathematics
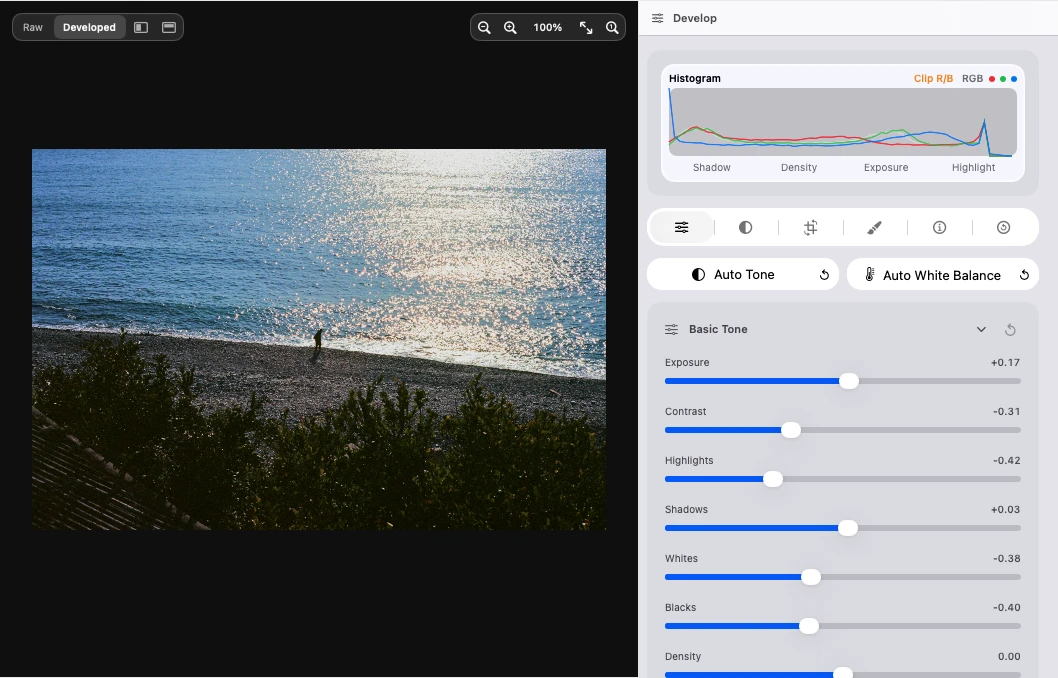
Inversion and tone are computed in 32-bit float linear space prior to gamma encoding, minimising clipping and tone degradation.
Density D = log₁₀(Dmin/T) is calculated from linear transmittance and unexposed base measurements.
Applies a dedicated print response curve with an exact inverse function derived from four reference points.
Film emulsion properties, scan light source, and scanner target looks are evaluated in separate stages.
Converts to sRGB, Display P3, Adobe RGB, or custom RGB Printer ICC profiles at the final display and export stages.
Supports full 48-bit RGB (16-bit R/G/B, 281 trillion colors) input and output, which keeps posterization and banding down through heavy tonal adjustment.
Pairs 48-bit I/O with 32-bit float linear processing, leaving headroom for film archiving and large prints.
Capture Workflow
Imports RAW/TIFF files. Decouples backlight color temperature from unexposed base for even inversion.
Connects to SANE scanners through the out-of-process negaflow-scanner-sane plug-in. It imports 16-bit TIFF only when the device and backend support it and the plug-in verifies the result.
Film profiles
The bundle contains 15 scanner profiles made from film material I photographed myself. The profiles record 928 image observations, and every profile is currently marked realOnly.
realOnly identifies a profile built from real scans and still under active development and refinement. More scan material from a wider range of films and equipment will be added, and the profiles will continue to expand and improve with it.
Profiles are never applied from the scanner name alone; the user selects one explicitly. SHA-256 hashes are provided for both the files and the list.
928 is the sum of the observations in each profile, not 928 distinct photographs. The same film can be counted for more than one scanner. The scans were reviewed directly, files with false detections were excluded, and the profiles were built from those measurements.
Comparison
negaflow is a standalone macOS app for film inversion, development, defect repair, print and export. The table below describes negaflow’s current features. Features, prices and file handling in Negative Lab Pro, FilmLab, Negbase, SilverFast, VueScan and other products vary by version.
| Feature | negaflow | Other film tools · check current product docs |
|---|---|---|
| Price and licence | Free, Apache-2.0 open source. No subscription, no trial limit, source readable | Free, one-time purchase and subscription options vary by product |
| How it runs | Standalone macOS app: import, develop, repair, print and export in one place | May be a plug-in, standalone app or scanner application |
| Film base (Orange Mask) Measurement | Spatial analysis (FilmBaseEstimator), eyedropper, direct RGB input | Film-base handling varies by product; check its current documentation |
| Defect Restoration (GrainMend) | RGB restoration with reviewable masks; optional IR when the plug-in provides it | RGB restoration and hardware IR are different methods; support varies by product |
| Original File & Metadata Integrity | Non-destructive, BagIt archive specification, SHA-256 validation | Original and sidecar handling varies; check before use |
| Roll-level EXIF Metadata | Automatic composite EXIF export for camera, lens, film, exposure | Metadata fields and export behaviour vary by product |
| macOS Native Acceleration | Metal & Core Image 32-bit floating-point pipeline | Processing and hardware acceleration vary by platform and product |
Guide
A camera-scanning setup can be fast and detailed when the lens, alignment and film flatness are right. Here is a practical route from the rig to the raw files.
Use a camera that shoots raw, a macro lens suited to the required reproduction ratio, a film holder, a light pad, and a copy stand or tripod. Extension tubes and bellows can work; check corner sharpness and field flatness at the actual capture ratio.
Use an even, diffused light source. CRI 95 or higher and 5000–5500K are common starting points, not a guarantee of colour accuracy. Check for flicker or banding before the session and adjust shutter speed if needed.
The sensor plane has to be parallel to the film, or only part of the frame is in focus. The reliable way: put a small mirror on the light pad and adjust the camera until the reflection of the lens sits dead centre in live view. A spirit level only tells you anything if the tripod column is truly vertical.
Curled film moves the edges out of focus. Start with a film holder. If glass is needed, test the actual film for reflections and Newton rings.
Start at base ISO and test the lens for its sharpest aperture; f/5.6–f/8 is a common starting range. Focus manually with magnified live view, use a remote release or timer, shoot raw, and keep the bright end of the histogram from clipping.
Open the raw files in negaflow and the film base is found for you: it groups connected regions in the brightness distribution and drops sprocket holes, the holder and bare backlight. If the result is off, sample unexposed film with the eyedropper or type the RGB in.
Guide
There is a reason the colour goes muddy when you flip a curve. Three separate things have to happen: the orange mask is divided out, the inversion runs in linear light, and a print curve goes on top.
The orange mask is a filter over the whole frame. Measure it on unexposed film rather than inside the picture, or that frame's own colour ends up in the mask. negaflow finds it by grouping connected regions in the brightness distribution; the eyedropper and direct RGB entry are there too.
The mask is a transmission, so it divides out in linear light. D = log₁₀(Dmin/T). Subtract it from a gamma-encoded 8-bit image instead and the channels come apart — that is the crossed colour everyone knows.
Invert after gamma and the shadows are the first thing to block up. negaflow finishes the inversion and the tone work in 32-bit float linear, then hands off to the output colour space.
A negative has no black and no white of its own. Photographic paper decided those. A curve anchored on black, 18% grey and white is what makes the result read as a photograph.
One base measurement covers a roll shot under one light. Set it per frame and the tone wanders across the roll. Carry one value through all of them and correct exposure frame by frame.
Development targets are selectable looks, not copies of a lab scanner’s software or output. Export 16-bit TIFF for further editing, or JPEG with the roll information written to EXIF for a ready-to-use file.
Pro Pipeline & Productivity
Copy only the development settings you choose, then fine-tune individual values from the keyboard.
Colour negative, positive slide, black-and-white negative and positive each use a film-type-specific path.
Film-base measurements and the selected light-source profile are recorded separately. Automatic measurement can be replaced with the eyedropper or direct RGB values.
Copy selected settings from one frame to others in the roll, then adjust individual frames where needed.
Advanced Precision & Library Tools
Inspect thumbnails and preview renders immediately even when external drives or NAS storage are disconnected.
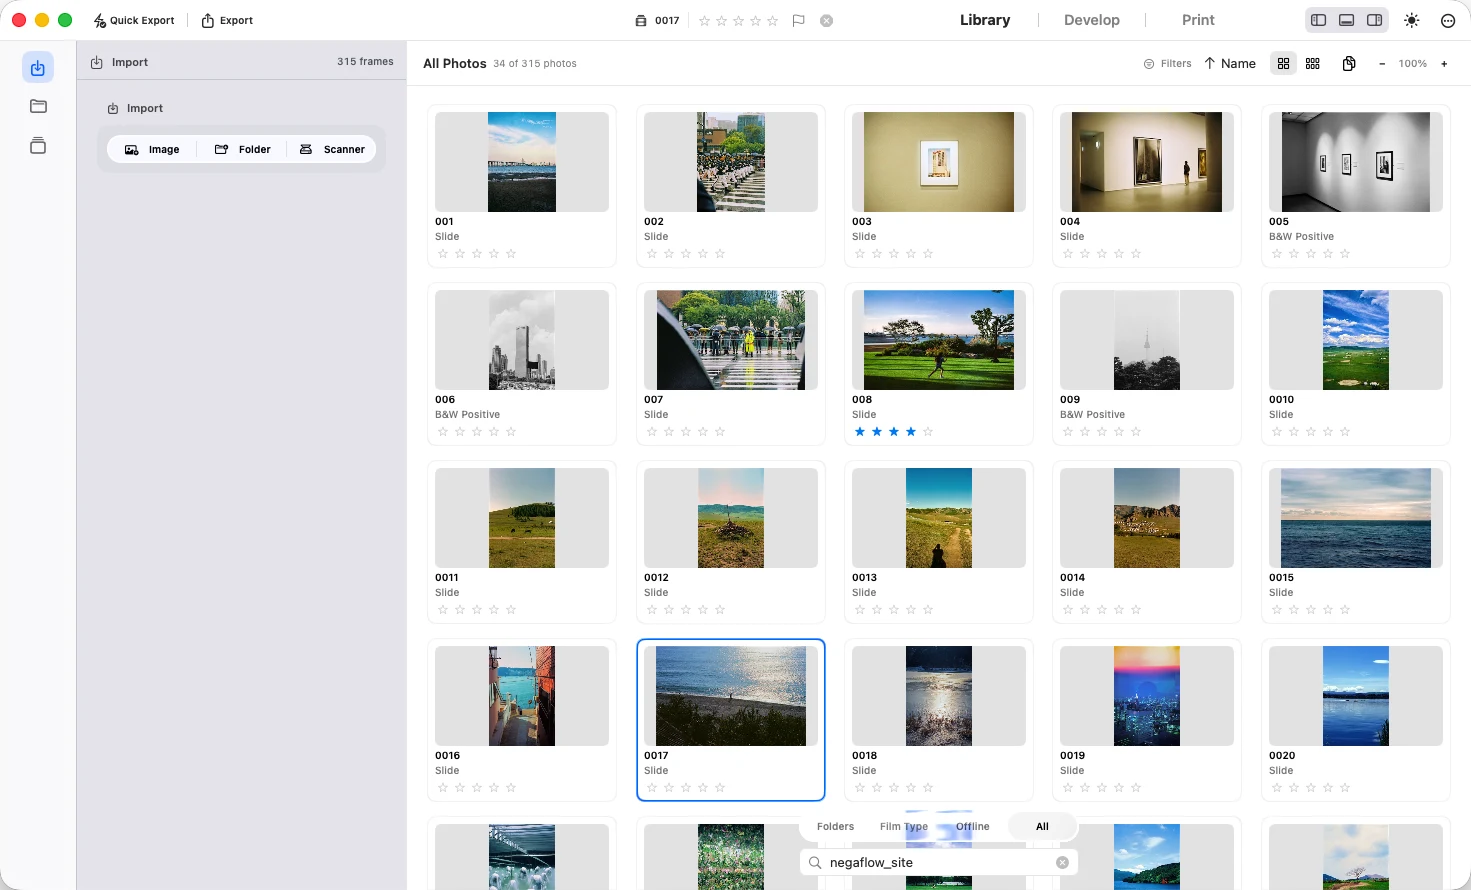
Search file names, folders, rolls, film, camera, lens, keywords and dates, then filter by rating and workflow state.
Record RGB, Lab and DeltaE00 from a pinned IT8.7/1 image and reference file. Real scanner accuracy still requires that device and its matching physical target to be measured.
Adjust clarity, sharpening, noise reduction and film grain separately.
Adjust shadow hue, highlight hue and strength for sepia and selenium toning.
Source, resolution, bit depth, scan area, exposure and IR controls appear only when the plug-in reports them.
Configure export presets and dynamic file naming rules such as {film}_{date}_{roll}_{num}.
Follows the macOS Light and Dark modes and observes native system accessibility standards.
The workspace
01
Rolls, folders, collections, ratings, stacks, and virtual copies.
negaflow-scanner-sane. Scan results are easy to review from Library.
GitHub ↗
02
The development engine is called Chroma Engine, and dust and scratch restoration is called GrainMend. The entire process is developed independently, with 15 scanner profiles built from film material I photographed myself.
03
JPEG and 16-bit TIFF export, ICC profiles, and print layouts.
04
Customise shortcuts, folder paths, presets, and adjustments.
Basic workflow
Scanner plugin
negaflow-scanner-sane is the plugin used by Scanner Import in negaflow.
Scanner support
Known SANE 1.4 targets and the paths handled by negaflow-scanner-sane.
| Scanner family | SANE backend | SANE 1.4 status | Plug-in path |
|---|---|---|---|
| Plustek OpticFilm 7200, 7200 v2, 7200i, 7300, 7400 v2, 7500i, 7600i | genesys |
Complete | Dedicated film-scanner path |
| Plustek OpticFilm 7400 v1 | genesys |
Listed as Complete, but its model-specific corrections landed after SANE 1.4.0 | Capability-driven path; stock 1.4.0 hardware result is unverified |
Plustek OpticFilm 8100, USB 07b3:130c |
genesys |
Complete | Dedicated film-scanner path |
Plustek OpticFilm 8100, USB 07b3:1824 |
None | Unsupported | Not treated as usable |
Plustek OpticFilm 8200i, USB 07b3:130d |
genesys |
Complete | Dedicated film-scanner path |
Plustek OpticFilm 8200i, USB 07b3:1825 (GL128) |
None | Unsupported | Not treated as usable |
| Plustek OpticFilm 120, 120 Pro, 135, 135i, 9000i Ai | None | Unsupported | Not treated as usable |
| Epson Perfection V700/V750 (GT-X900), V800/V850 (GT-X980) | epson2 |
Good | Transparency source and positioned flatbed area when reported |
| Nikon Coolscan LS-2000, LS-40 ED, LS-50 ED, LS-4000 ED, LS-8000 ED | coolscan3 |
Complete to Minimal; varies by model | Dedicated film-scanner path |
| Nikon Coolscan LS-5000 ED | coolscan3 |
Untested; may work similarly to LS-50 according to SANE 1.4 | Dedicated film-scanner path |
| Nikon Coolscan LS-20, LS-30, LS-1000 | coolscan |
Varies by model | SCSI only |
| Nikon Coolscan LS-9000 ED | None | Unsupported | Not treated as usable |
| Reflecta ProScan/CrystalScan/DigitDia and PIE PowerSlide | pieusb; old SCSI models use pie |
Varies by model and model number | Options are accepted only when reported |
| Pacific Image PrimeFilm XA, XAs, XA Plus | None | Unsupported | Not treated as usable |
| Other transparency-capable flatbeds and film scanners | Varies | Varies by model | Capability-driven; no model-name fallback |
This table does not guarantee that every unit with the same product name will work. Check the current SANE device list, then verify the connected unit with scanimage -L and scanimage -A.
Analog photography is growing again, but the process behind it has stalled.Unless film is printed optically, it has to be converted to digital before we can see it.Yet that whole process is slowing down as labs close and support from manufacturers and products declines.
This project began with the things that felt inconvenient and the features I wished existed.Drawing on what I learned from using 35mm and medium-format film, I built the entire process myself, one piece at a time.It began as a toy project for my own use, but negaflow has become something more.
What matters most is that it works well, is comfortable and fast to use, and produces a proper result.The independently developed negaflow is native to macOS and brings together workflows for both film labs and individuals.
For the summer of the 200th anniversary of the first photograph made by Niépce.
Release Notes
Download the current version from GitHub Releases. The Universal PKG is the right choice for most Macs and installs negaflow.app directly in /Applications. DMG and ZIP files are available on the same release page for manual installation.
negaflow-1.0.5-1-macOS-universal.pkg
Apple Silicon and Intel
negaflow-1.0.5-1-macOS-arm64.pkg
Apple Silicon only
Connecting a physical scanner requires a separate scanner plugin.
FAQ
Current GitHub release files are ad-hoc signed. If macOS blocks the first launch, navigate to System Settings → Privacy & Security and choose Open Anyway.
Physical scanner connection requires the separate open-source negaflow-scanner-sane plugin. Without the plugin, you can immediately develop camera copy files or existing scans (TIFF, JPEG, RAW).
Yes, it supports all camera RAW formats handled by macOS Image I/O, as well as 8-bit/16-bit TIFF, JPEG, and PNG files.
No. negaflow is non-destructive. Original files and third-party sidecars are never modified; all edits are stored in an independent SQLite catalog.
Yes, negaflow is distributed as a Universal PKG for both Apple Silicon (M1/M2/M3/M4) and Intel Macs, requiring macOS 14.0 or later.
Yes. You can export 16-bit TIFF or JPEG files with preserved EXIF metadata and seamlessly pass them to Lightroom, Photoshop, or Capture One.
No. The plugin is only required for controlling physical flatbed or film scanners. Digital camera copies (RAW/TIFF) can be developed out of the box.
negaflow is open-source software under the Apache License 2.0. It is completely free to download and use with no monthly subscription fees. It is free. Free as in it costs nothing, and free as in you can read the source, change it and pass it on — just keep the licence and the notices, and say what you changed. The name is a separate matter — Apache 2.0 does not grant trademark rights.
The catalogue uses SQLite in WAL mode and reduces frame caches under memory pressure. Actual speed depends on library size, storage and the Mac.
Yes. You can save custom presets or use Settings Paste Scope to selectively copy exposure, tone, or dust restoration adjustments to entire 36-exposure rolls.